1.System Burning&Configuration
Step 1 Download the burning tool
Raspberry Pi have developed a graphical SD card writing tool that works on Mac OS, Ubuntu 18.04 and Windows, and is the easiest option for most users as it will download the image and install it automatically to the SD card.
You can download the Raspberry Pi Imager tool for your platform via the links below:
Please note that the installation package you downloaded is version 1.8.5.
Step 2 Download system image
When you launch the installer, your operating system may try to block you from running it. For example, on Windows I receive the following message:
If this pops up, click on More info and then Run anyway, then follow the instructions to install the Raspberry Pi Imager.

We also need to download the corresponding .img system image package, which we can download at this website.
Depending on your Raspberry Pi model, we currently offer images for the Raspberry Pi 3B 4B and 5.
Step 3 Insert the SD card into the card reader and computer
Insert the SD card into the card reader and plug it into the usb port of your computer.
Step 4 Select SD card and image
Select your Raspberry PI model in the burning software, and select the operating system of the corresponding img package you just downloaded.
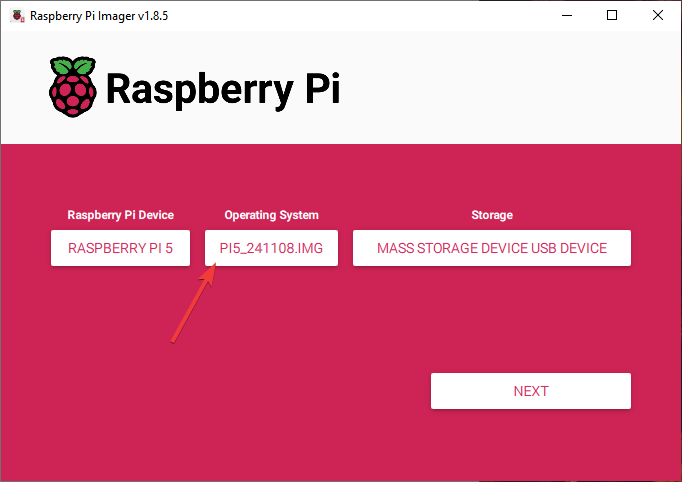


Select the SD card you are using.

It should end up looking something like this.

Step 5 Configure burn Settings
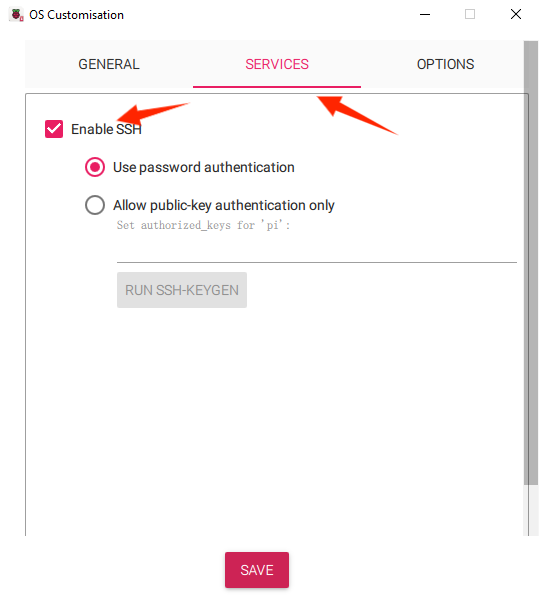
Press Ctrl+Shift+X or click the setting icon to open the Advanced options page to enable SSH and set username and password.
Warning
Now that the Raspberry Pi doesn’t have a default password, you will need to set it yourself. Also, the username can be changed.
For remote access, you will also need to enable SSH manually.
You need to enter the Wi-Fi name and password in “Configure wireless LAN,” and also set the Wi-Fi country, otherwise, you won’t be able to connect to the internet.
Our user name and password here are pi and admin.

Wireless LAN country should be set the two-letter ISO/IEC alpha2 code for the country in which you are using your Raspberry Pi.
Then scroll down to complete the wifi configuration and click SAVE.
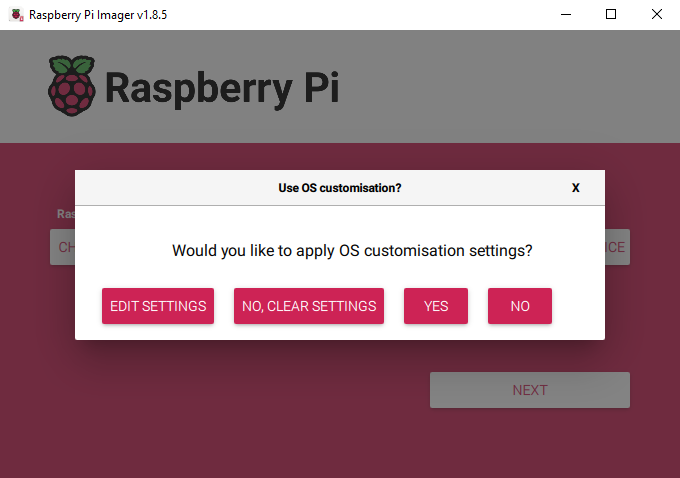
Step 6 Confirm Custom Settings
When asked “Would you like to apply OS customisation settings?”, press “YES”.
Step 7 Final Confirmation
If your SD card currently has any files on it, you may wish to back up these files first to prevent you from permanently losing them. If there is no file to be backed up, click Yes.

Step 8 Burn completion
After waiting for a period of time, the following window will appear to represent the completion of writing.

Need Help?
tech_edu_service@outlook.com